If you have come this far, congrats. You have Griggi router setup in a usable state. You will be able to limit data at user level. But there are a few other cool things that Griggi can do. This blog post will let you do those setup.
- automatically prioritizing traffic so that bulk traffic (download, youtube, torrents) dont clog your internet bandwidth
- Connect multiple ISPs for load balancing & failover to have 100% internet uptime.
Note that not all Griggi routers are capable of doing the advance things above. If you have a Griggi router that does not have router dashboard coming up at http://192.168.7.1, your router probably will not support the features below as the space on the router is too less to bundle some of these features.
1. Configure Prioritization
You need to be aware of your general upload & download speed of your ISP which prioritization software uses to avoid bandwidth clogging.
If you are not sure, try running speedtest & note upload and download values. While filling upload & download values below, fill 90% of the values you got from speedtest. Eg. if download speed shows up as
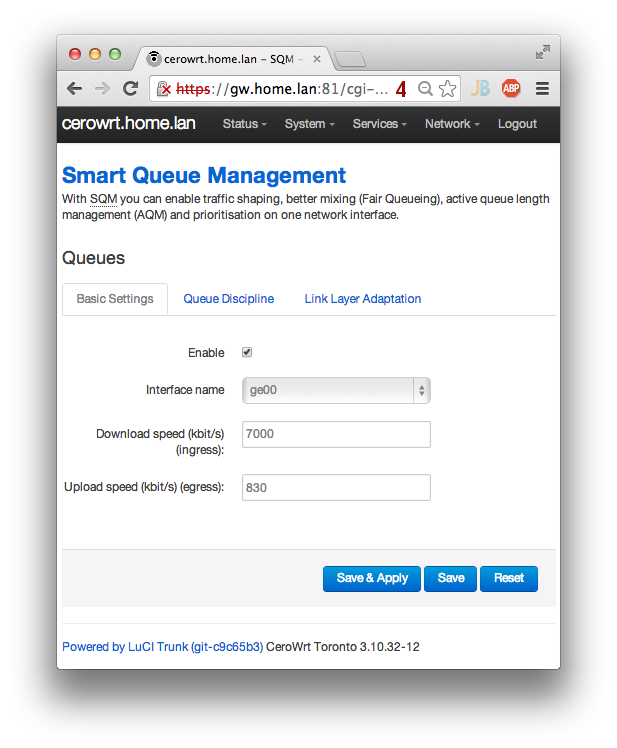
- Navigate to Network -> SQM QoS
-
Enable SQM
-
Figure which interface is the WAN interface by navigating to Network -> Interfaces. It usually is eth0 or eth1. Select the WAN interface in SQM.
-
Specify download & upload speed in kbps. 1 Mbps should go as 1000. Save settings.
To test if your prioritization is configured right, launch a terminal & run a continuous ping to google.com . Notice the delay in ping. Start a long download, youtube video or speedtest. The delay in ping should not increase significantly. Neither there should be any ping packet drops.
You can run the same test after disabling SQM. You should see difference in ping times.
2. Configure Load Balance
You can plug 2 internet lines to a Griggi router. The traffic gets divided on two lines based on metric(weight) that you set on each of the wan interface. Eg. if one interface support 100 Mbps speed & the other 10 Mbps, you should put metric 10 for 100 Mbps line & 1 for 10 Mbps line.
In case if one of the internet line goes down, all traffic starts to route through the other line.
In Griggi router Load Balancer is enabled by default. The first LAN port (port marked 1) is the secondary internet port which we have named as WWAN. All you need to do is follow below steps to assign metrics to WAN and WWAN.
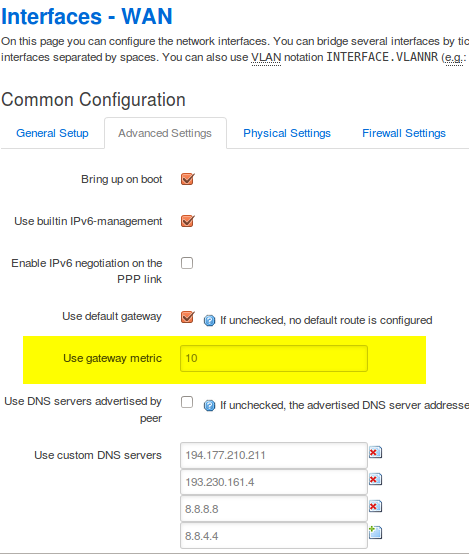
- Setup interface metric by navigating to Networks -> Interfaces -> WAN/WWAN -> Advanced Settings . Set Use gateway metric for the appropriate metric value for the interface.
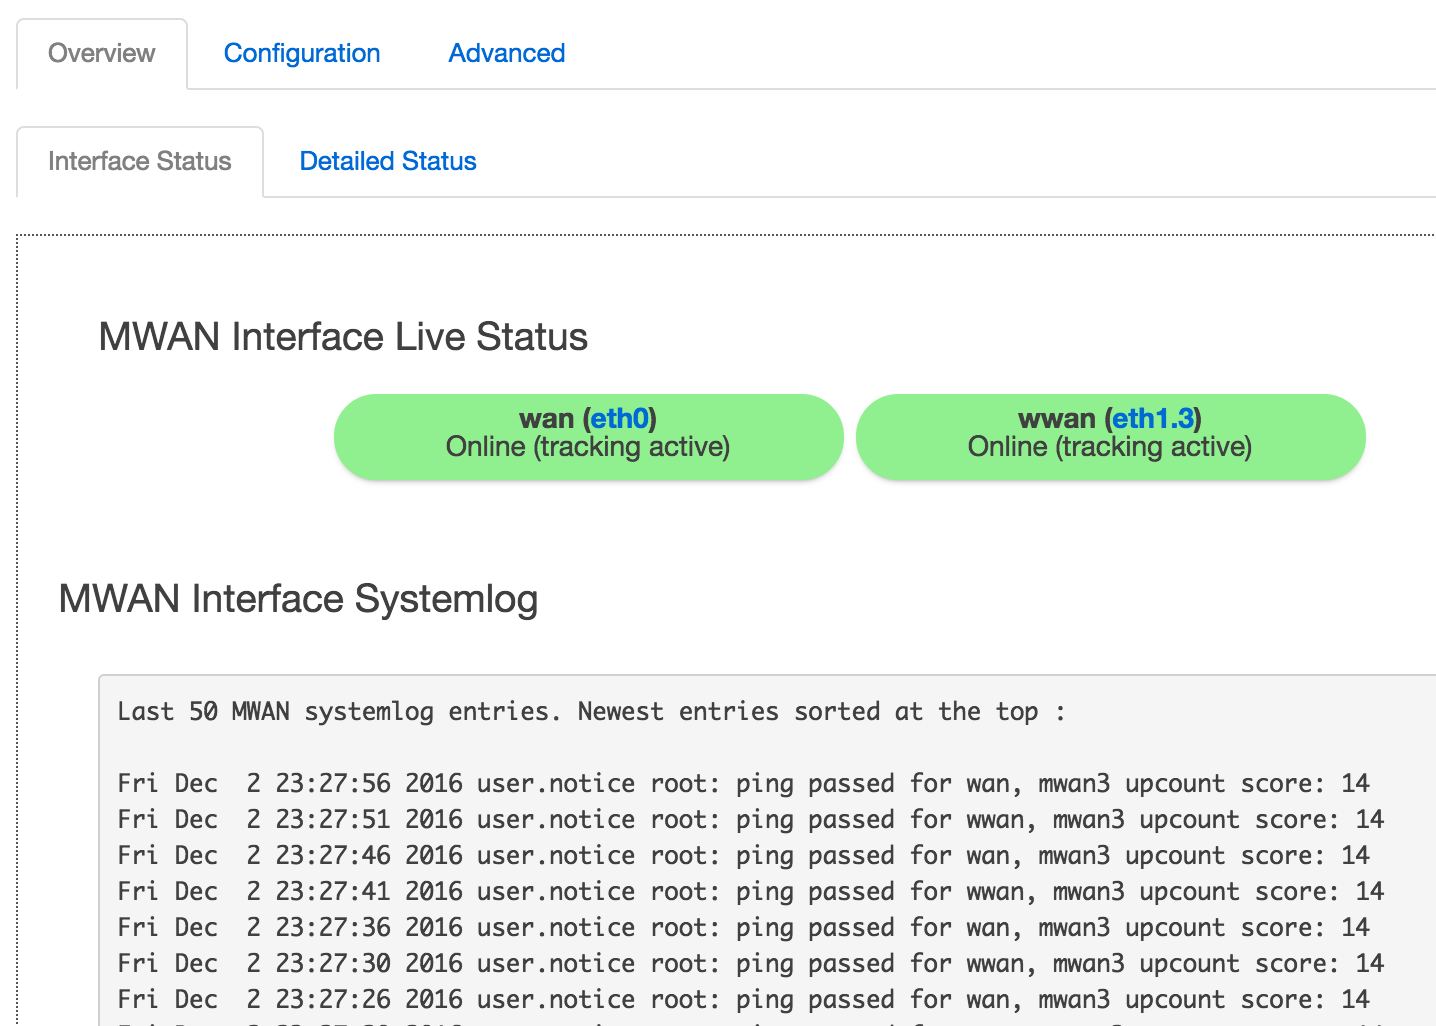
To test if load balance is configured right, plug internet lines in both WAN & WWAN ports. Navigate to Network -> Load Balance & you should see both wan interfaces green.
Note that now that you have two external interfaces, you should configure traffic prioritization for WWAN interface as well. Navigate to Network -> SQM QoS, click on Add Interface & follow steps under ‘Configure Prioritization’ above for the WWAN interface