Griggi is developed as package(s) that can be compiled & installed on any unix based operating system. Openwrt seems to be the most popular flavor of opensource router OS now a days, so we provide Griggi pre-bundled Openwrt firmware image that you can directly flash on your Openwrt router.
To know if your router supports Openwrt, head over to Openwrt Table of Hardware & search for your router model
So far, we do not have need to support all Openwrt routers as most of the time, we suggest an appropriate router to our users, or we get one of that, follow the instructions & ship a pre-bundled Griggi router.
1. Download Griggi firmware
You are here mostly because you chose to install Griggi yourself on a router we suggested.
To get Griggi pre-bundled Openwrt firmware image on your router
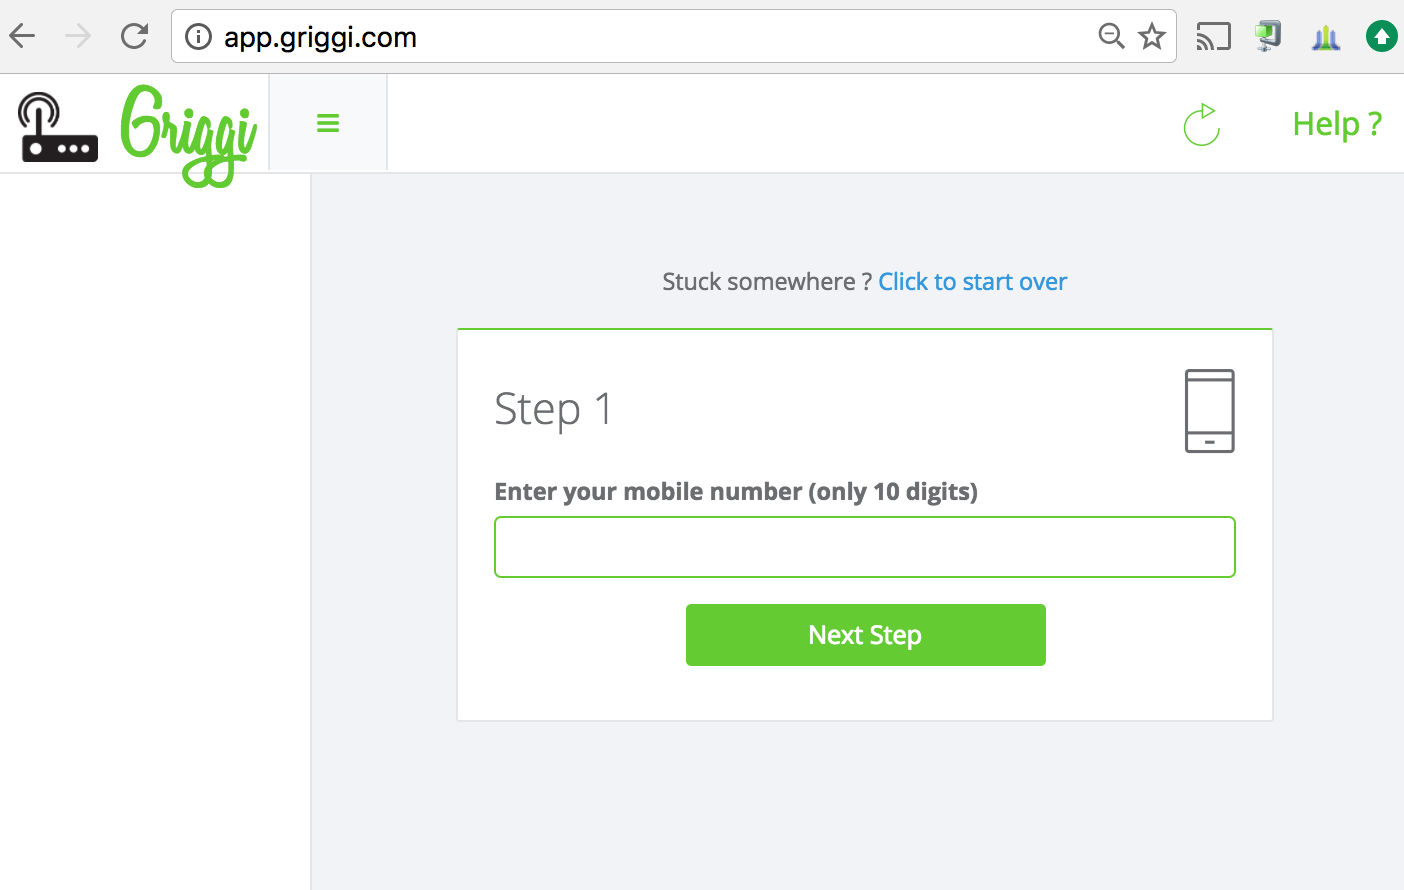
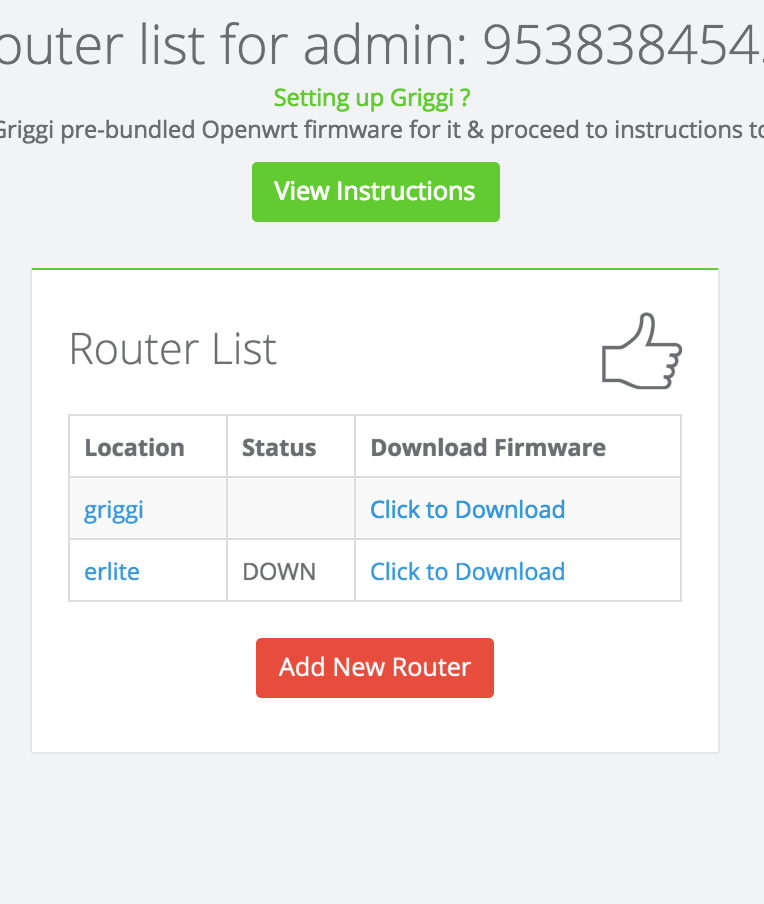
- head over to app.griggi.com & login with your phone number
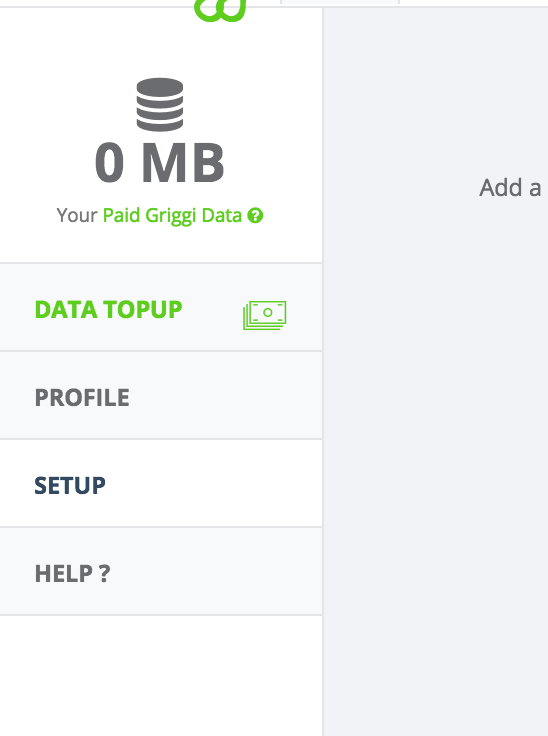
- navigate to ‘SETUP’ option on the left sidebar
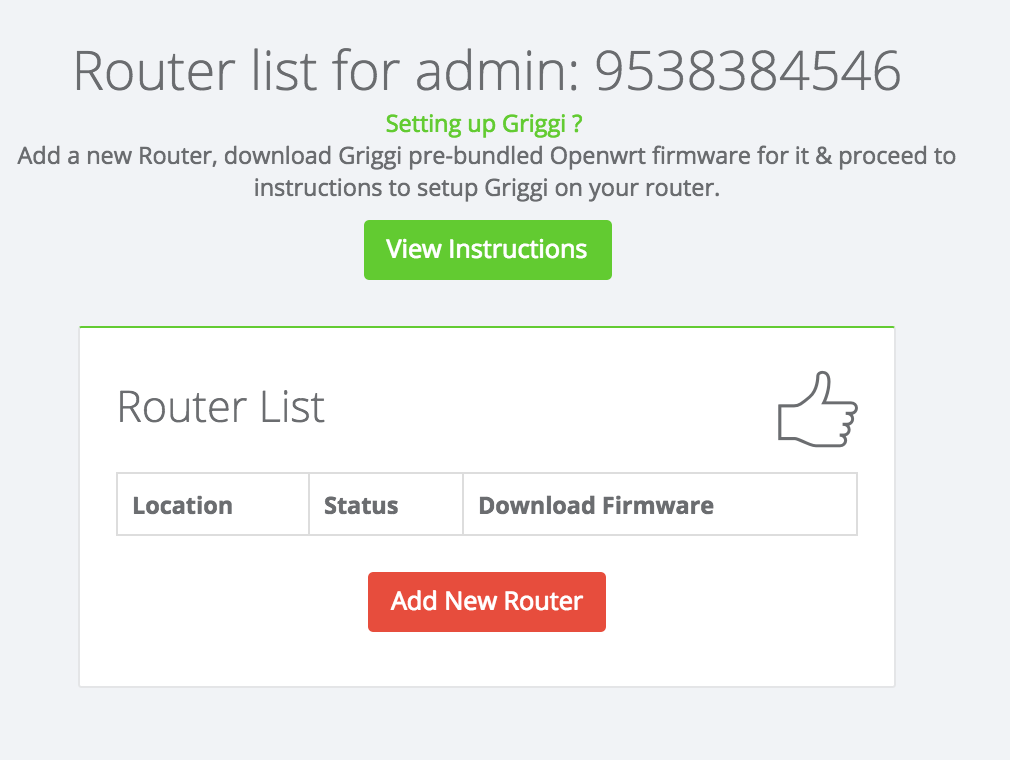
- choose ‘Add a Router’, enter details & download firmware for your newly added router
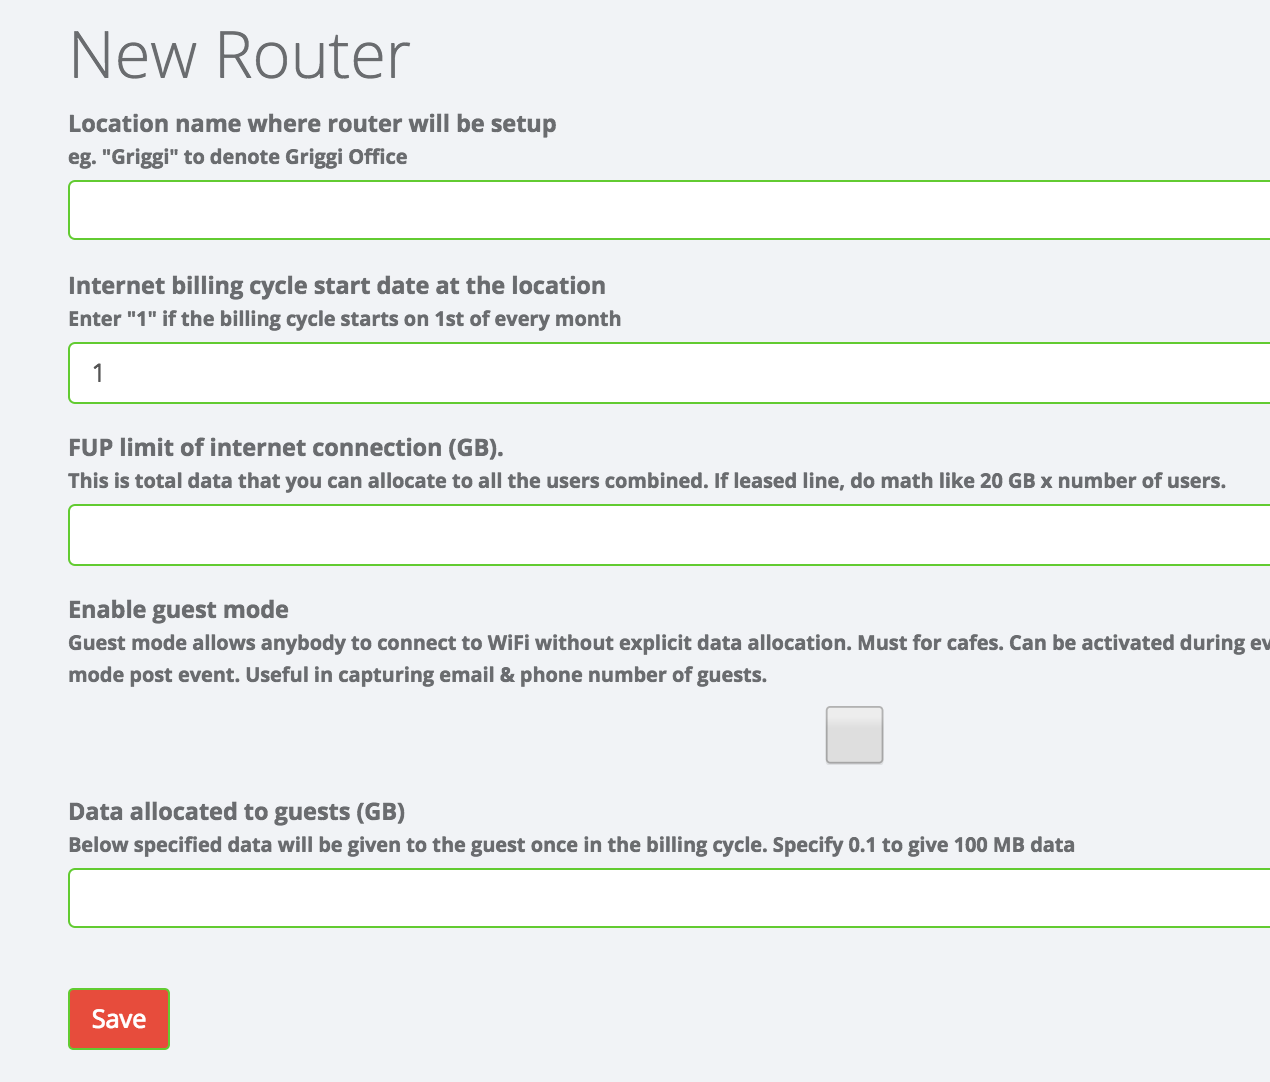
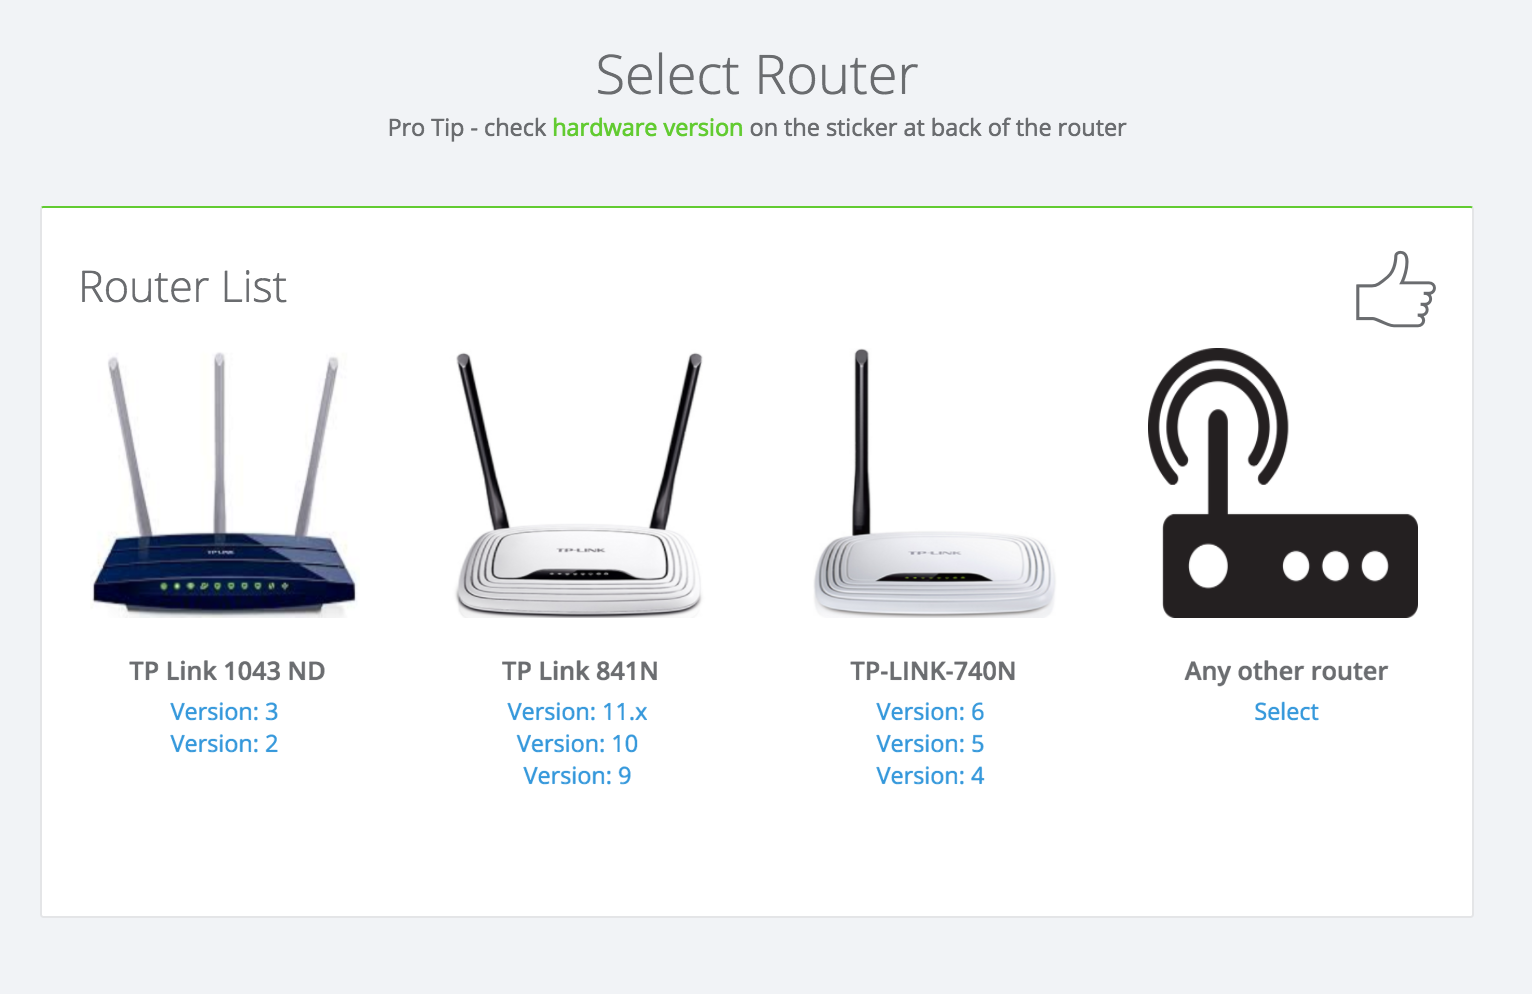
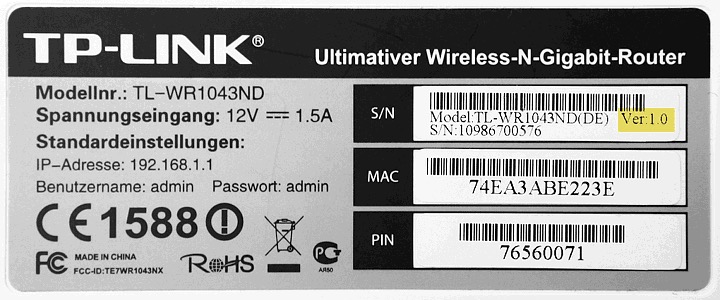
Select your router from list of supported routers. Make sure you pick the right hardware version from the sticker at the back of the router.
2. Flashing Griggi on the router
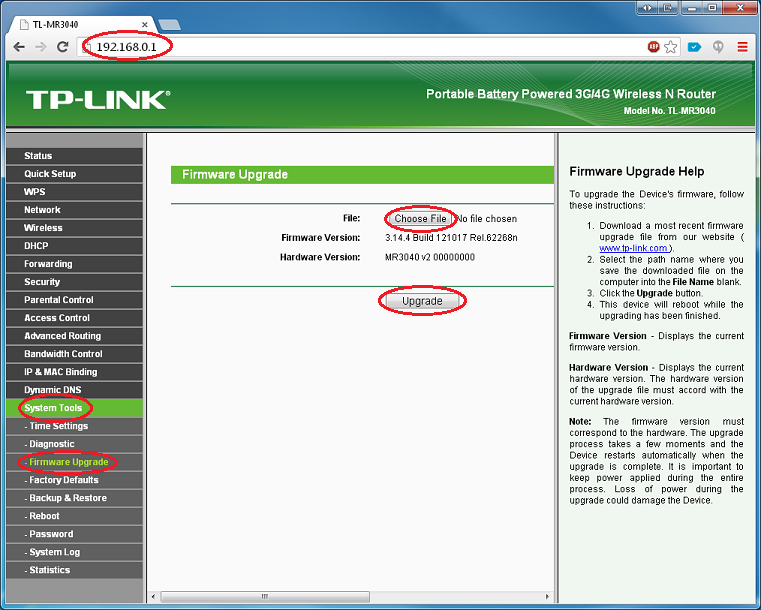
Power your router. Connect to it through internet cable or WiFi. Navigate to the router dashboard. Usually it is at http://192.168.0.1 . It will show up a login page.
If it is a new router, the login credentials are on the sticker at the back of the router
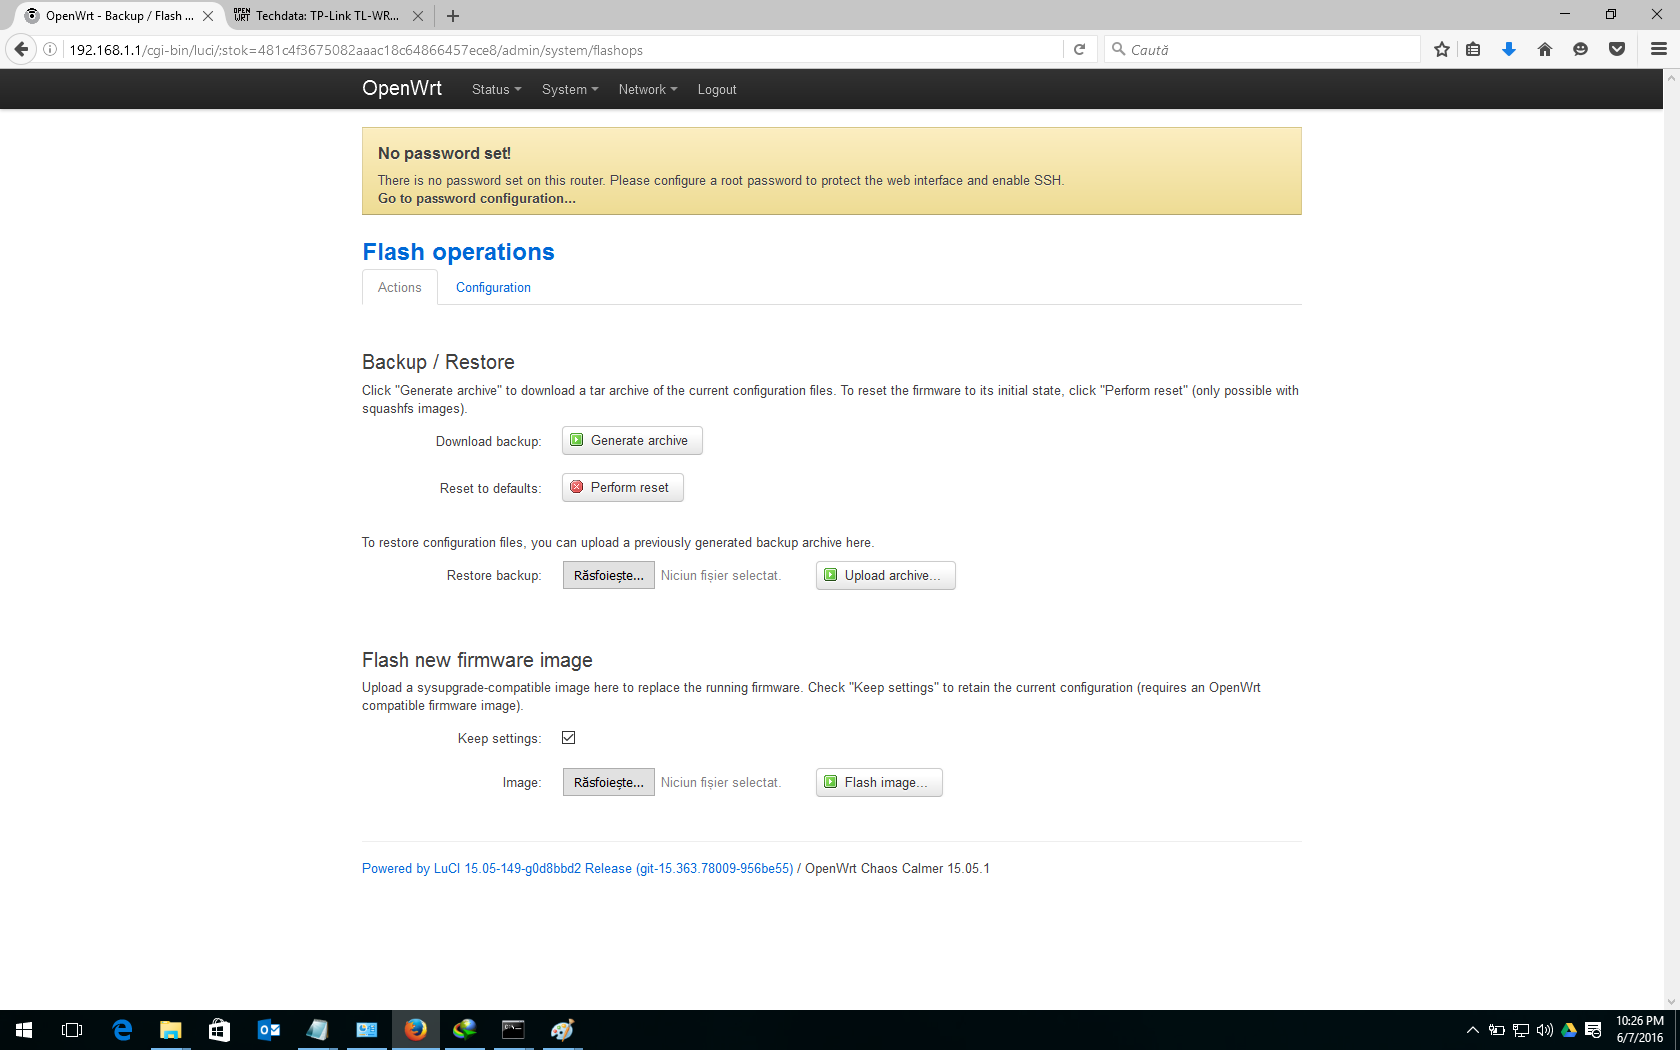
Post login, locate the firmware upgrade page as shown below. Upload the firmware downloaded in previous step.
Ensure that power does not go off while the firmware uploads. If it does, it might brick your router.
There is a high chance you have TP Link router if you following this guide. You can debrick your router by following this guide.
Feel free to email us at team.griggi@gmail.com if you need any personalized help.
Note - if you are updating Griggi, your dashboard is at http://192.168.7.1. Username is root & password is what you had set earlier. You then need to head to System -> Backup / Flash Firmware option. Under Flash new Firmware image, upload the image, keep settings checked & just do it :-).
Post flasing the new firmware, your router will reboot. Wait for the WiFi to come back up. There is a WiFi named griggi to which you can go ahead & connect.
If you are using TP Link 1043ND router - the WiFi on Griggi is disabled as there is known issue with Openwrt & this particular model. In this case, you need to connect to the router through internet cable through one of the LAN ports (yellow color ports).
Dont connect to port 1 as it is converted to secondary WAN port for load balancing. Use one of 2 to 4 marked yellow port to connect to the router.
3. Configure Griggi router
A few configuration need to be manually done to router before you start to use Griggi.
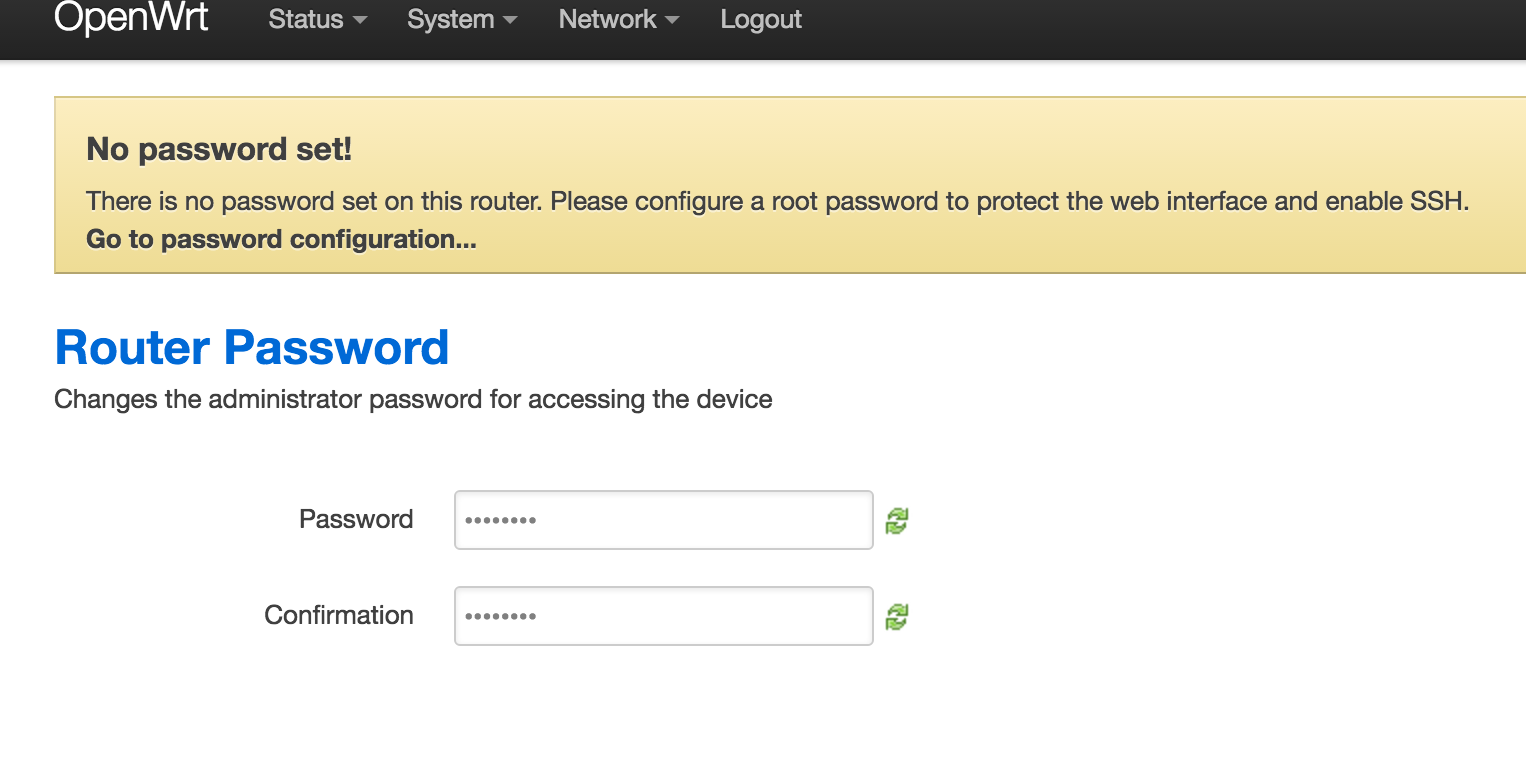
1. Setup admin password
Navigate to htttp://192.168.7.1, you will see Openwrt login page. There is no password by default. Setup a password first thing.
If you dont see a login page at http://192.168.7.1 - that means we did not bundle Luci (Openwrt admin dashboard), mostly because the router flash size is too small to support that. Openwrt has, by default, telnet enabled. Telnet to your router with telnet 192.168.7.1, set password by running passwd command & you have the password changed.
Openwrt disables telnet once you have set root password. You can now ssh into the router with ssh root@192.168.7.1 & the password you have set.
2. PPPoE settings (selectively applicable)
If your ISP asks you to login when you connect to internet, there is PPPoE applicable in your setup. ISPs like ACT, Tikona, Beam etc have this implemented.
Griggi does not work well with another authentication system. There is a way for PPPoE login to be done by the router itself.
- Navigate to Network -> Interfaces
- Click ‘Edit’ on ‘WAN’ interface. In ‘Protocol’ drop down menu select PPPoE, then click ‘Switch Protocol’`.

-
Enter the username & password provided by the ISP in the appropriate field & save the settings.
-
For those with no admin dashboard, ssh into the router & edit
/etc/config/networkfile. The wan port by default is set to dhcp. Update proto to pppoe & append username & password provided by your ISP as below.
  config interface 'wan'
    .
    .
    option proto 'dhcp'
    option proto 'pppoe'
    option username 'xxxx'
    option password 'xxxx'
To test if your settings are working, plug in the ISP line in the WAN interface, connect to the WiFi (or through wire if you are on 1043ND), you should see griggi authentication popup. If it does not, try manually going to griggi.com on the browser & you should see the login page.
If none of this happen, either there is software or hardware configuration problem. Sort this out before proceeding.
4. Advance Settings
To configure traffic prioritzation & load balancing on your Griggi router, head over to this blog post
If you have a big setup, you might be looking to setup Access Points (hence referred to AP) to make your WiFi reach everywhere. Moreover, each router comes with limited number of people it can support on its WiFi. So you might be looking to add more such devices. Also, if you have TP Link 1043ND, you need at least one AP for the WiFi signal to be available. Head over to this post to do so.
5. Allocate Data
The settings you did above are on Griggi router. Most of the times, you do not need to edit any of the above stuff & they are good for one time setup.
What you need to on regular basis - is to keep an eye on data usage at user level, first time data allocation post Griggi setup to all the folks, adding data for folks who come in later, deleting entry for folks who leave the premise etc.
This can be done on Griggi dashboard - app.griggi.com. By default whoever sets up the Griggi router is the admin. Once you login into your Griggi dashboard, you see all the data in your account from which you can give data to other folks through their mobile number. Look for Give Data button on the dashboard.
By default, when a new device connects to Griggi WiFi, there is a popup that comes (like how you see in Airport) where the user is suppose to enter his phone number, verify OTP, set his email & password. If you as admin has allocated data to the phone number, his internet will work, else it wont. He gets his own dashboard, pretty much like yours, on which he can view how much data he has consumed. The consumed data resets to 0 at the start of billing cycle.
The login on a device needs to be done only once. So unlike a cafe or airport when you see a login screen everytime you enter the premise, Griggi router identifies a device on which login is done already & WiFi connects seamlessly like home/office WiFi
Some old OS dont show popup. Also, the device will not get a popup if connected through LAN interface. In that case, the user need to manually go to http://griggi.com to login.
By default, the device once identified against a phone number, gets tied to the phone number. The data consumption is aggregate of all devices that belong to the user. The user is identified by his phone number. During onboarding, the user sets his email & its easier for you as admin to identify the user based on his email (than phone number).
On data allocation to a user, he gets SMS notification. Once a user data is over, he also gets a SMS notification. Email notification is sent to the user on every GB of data consumed so that he stays aware of his usage. At any time, the user could head over to his Griggi dashboard to view his current usage.
Like admin, a user can give data to any other user from his quota. By default, the admin gets all the FUP quota from which he assign data to folks. The same flow applies to the users who eventually give data from their quota to others. Total data in the system stays constant & decided by the FUP set by the admin while adding new router.
Enough of gyan. Its time for you to allocate data to folks. Remember, there is a guest mode too that you can activate when you have too many folks checking in & you dont want to take hassle of allocating data to each user.
Happy ‘Griggi’ing .
If you have printers, internal server or IoT devices in your setup, they would need some configuration on Griggi for them to work. Steps are on this blog post